Tuesday, December 27, 2016

Kenmore Elite Model 790 (790.42800500) Induction Cooktop circa 2006 - Error 32

My wife and I noticed over the past couple months that every so often when turning on PowerBoost setting for the cooktop the power to the unit would start to flicker and with all the burner LED status lights flicking on and beeping, followed by a "32" in the timer window and a power off.  Not good.  We love the induction cooktop and weren't ready to give up on it.

A quick lookup at http://www.searspartsdirect.com/cooktop-repair/error-codes/kenmore-790-mode-linduction-cooktop-error-codes.html says "low voltage output from the 12 volt power supply on the filter control board".    A look at the Q&A for the model shows some other people have had this problem too..http://www.searspartsdirect.com/model-number/79042800500/0583/0121040.html?searchType=modelSearch&q=790.42800500&searchTerm=790.42800500 (this one has some decent diagrams).  The suggested replacement is a $533 filter control board, http://www.searspartsdirect.com/part-number/5304454971/0022/628.html?pathTaken=partSearch.   With this being about half-the cost of a new unit and nothing to lose, we decided to tear into it Christmas eve after lunch.

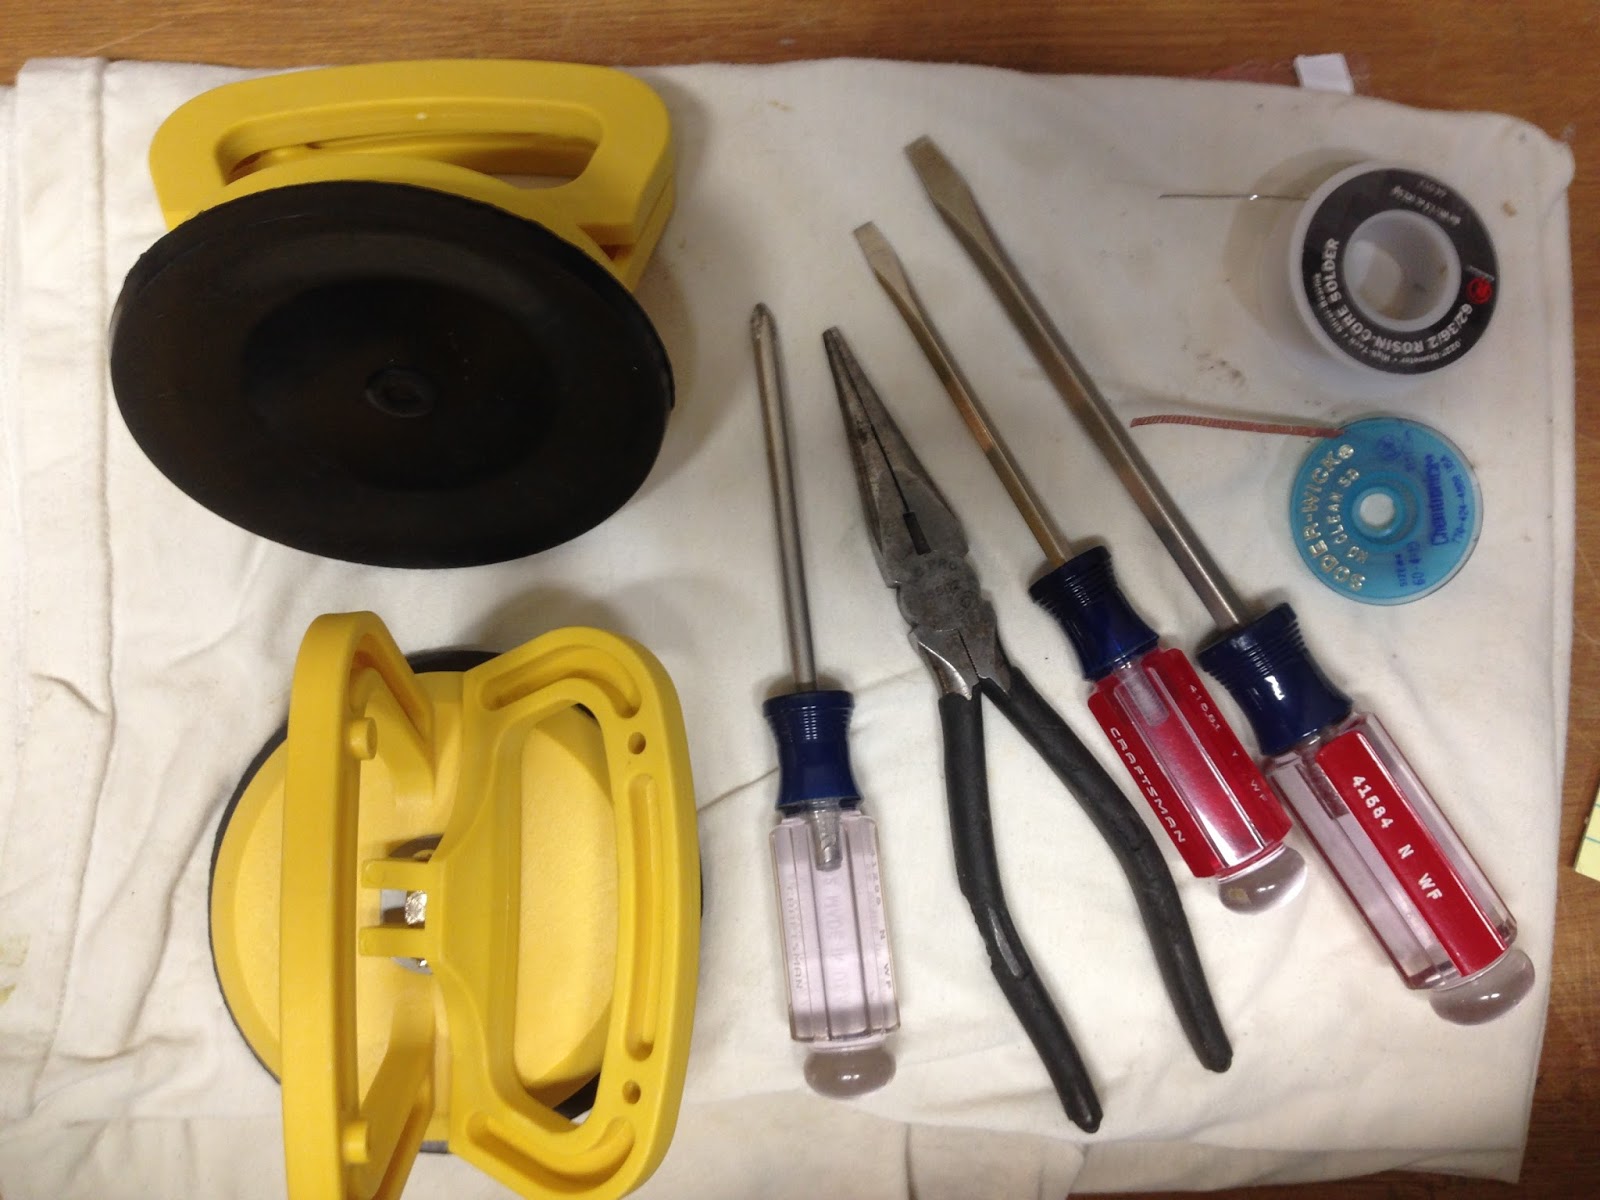
The tool set to tackle this one.
We were smart when we installed the thing 8 years ago that we just put some high-density polyurethane foam tape around the edge to seat it onto the counter (marble tile) with no adhesive.  After shutting off the breaker and disconnecting the pigtail whip, I used a tile/glass lifter to gently pull up at one corner and "break the seal" of it having sat in the counter opening for 8 years.  Once it was loose, I attached a second lifter and moved it over onto the island next to the opening.

It's not immediately clear the best way to get into this thing, but I have to admit that it is made to work on.  With the unit glass side down, open the wire connection cover and disconnect the wires and the the black cable hold.  At this point you can also remove the bus bar jumpers (copper) and all screws and set aside.

Next remove the black vent cover on the front edge and the sheet metal screws around the perimeter (10 or so) once you have them all out, the galvanized steel rear cover should lift off easily with the wires and pigtail still attached.  Gently remove the three soft fiberglass insulation pieces and the fiber board piece covering the electronics region and set these aside so they are not damaged.

Holding both the glass and aluminum inner section flip the entire unit over so it is glass side up.  Now gently lift the glass piece straight off (it is not adhered, yeah!).  This exposes the induction coils.

The induction coils.

The front button control board can be removed by sliding off the X5 connector, and the coils detached by unscrewing the leads and unplugging the temperature sensor wires.  Once the coils are removed, gently lift off the fiber insulation blanket.


Remove the screws attaching the aluminum support plate to the electronics case underneath.
The electronics guts.  The Range Noise Filter board is at top right.
Looking at the filter board, my wife immediately noticed "one of these things is not like the other"... One capacitor can was cracked open and showed some corrosion, I noticed a second that was bulged on the top.  These were either side (top and bottom) of the filter torroid in the upper left.


After removing all the wires connected to the board, there are two tangs on the left edge to release the board, lift it up, and slide it out of the rear screw connections.  (You did remove all the screws, didn't you).

I took the board to the bench and after a trip to the local Radio Shack, had two new capacitors at a whopping $1.50 each.  These can be removed from the board with a low wattage soldering iron, and alternately heating one lead and wiggling the capacitor away from the heated lead to "walk it out" of the board.  Once removed, use some de-soldering wick to suck up the old solder and open the holes for the new ones.


Place the new caps, getting the polarity correct!, the board is marked with a "+" and the caps with a 
"-".  Solder them in and reassemble the cooktop.

We noticed too that some of the induction coil lead fork connectors were splayed from over tightening in the factory.  These were straightened before reassembly.  Make sure all coil connections are a tight snug, but not overly so.

Put everything back in the reverse order of disassembly, turn on the breaker, and test it out with a pan of water and PowerBoost.  No more error "32".  About 3.5 hours including a run into Radio Shack for the capacitors, and $3 in parts.  Maybe $35 in tools if you don't have a soldering iron and de-solder wick.

Tachometer needle gone haywire

After several instances of the tachometer on my New Holland TC29DA reading all sorts of strange numbers, I discovered the plastic barrel backing that presses onto the tach shaft was split open.  The plastic is so darn small and thin, a glue-job to reassemble it was unsuccessful.

The whole instrument cluster comes out with two Philips screws, detach the multi-pin connector from the rear, and take in the gauge cluster to the bench.   Remove the Philips screws around the perimeter and separate the cover glass and bezel from the gauges.  Slide off the old needle (mine literally fell off when the gauge was inverted) and grind or sand the old plastic barrel flush.

I prepped a new backing with a 4mm wide brass strip and 2mm OD x 0.45mm wall tubing (about $6 from a local hobby store) that was soldered together to form a new base and barrel to attach to the tach shaft.  Epoxy the new brass base onto the needle and let it cure.  With a pair of diagonal cutters, put a slight crimp in the tube to give it a light press-fit onto the 1mm tach shaft.  BEFORE, you push it on, go back to the tractor and connect the instrument cluster, and turn on the ignition (without starting), this will set the tach shaft at 0 RPM.  Align the needle and press it on.

Turn off the ignition.  Disconnect the the gauge, and reassemble the cluster housing, bezel, and cover glass.  make sure the needle doesn't fall low and end up below the stop inside the bezel.  Put it all back together, turn on the ignition and the tach should come to 0, start the engine and set to idle and it should be at about 600 RPM.

Beats $670 for a whole new instrument cluster... NH doesn't sell just a replacement needle.... go figure.


New brass coupling fabricated out of some 4mm wide brass strip
 and 2mmODx0.45mm wall tubing

Tuesday, November 15, 2016

Kitchen Aid mixer leaking oil?

Getting into holiday cookie season can be tough.  Our 8-year old Kitchen Aid decided to start making noises and leaking oil out of the gearbox.  Before my wife could spend $200+ on a new one, I asked her to look on repairing it.  She found this great video:

http://www.ereplacementparts.com/article/5518/How_to_Fix_a_KitchenAid_Stand_Mixer_That_Is_Leaking_Oil.html

This turned into a good learning experience and a small family project for a Saturday morning after breakfast.  It really is easy to get inside the mixer, following the steps in the video.  We took the "divide and conquer" to remove the old grease which had gelled and lost its oil.  I took the main body a step further by removing the mixing shaft up through the center gear to clean the main gear and below it.

Not wanting to wait for special order grease or finding any food-grade grease locally, I substituted a Lucas Marine Grade (blue) from Lowe's, being billed as environmentally safe and a relatively benign MSDS.  http://lucasoil.com/products/grease/marine-grease

We repacked the gear box, put it all back together.  Works great, quieter, and smooth gear box!  All for about $5.

Wednesday, September 14, 2016

Windows 10 strikes again... BSOD

Just some thoughts I will be catching here as I've struggled through some problems with Windows 10, in hopes that someone else can learn.  This was a Win7 Pro box that was upgraded in place to Windows 10 Pro.  It's a 240GB SSD OS drive (C:) and 1TB RAID-1 data drive (D:, dynamic GPT)

It all started with a failure to launch Adobe PS Elements 11, with a looping activation error, after Adobe support was no help and tried to troubleshoot by enabling the hidden admin account by "net user administrator /active:yes" and I cut him off, I went into some things:
- create a new admin user and launch, no go
- launch with admin privileges, no go
- reinstall from DVD, from HD, re-enter SN or not, no go
- change C: drive permissions, no go
- recurse C: drive permissions/ownership from TrustedInstaller to Administrator account, BAD - Windows 10 would no longer boot (blue screen of roving cirles... and attempt to repair in Windows RE (recovery environment) and repair startup problems, said it couldn't fix then reported a "WDF_DRIVER_VIOLATION" on next boot along with a BSOD
- What I think happened was the Flexnet licensing got corrupted somehow...

So what happened:

  • Download Win10 install via Media Creation tool and place on USB drive.
  • Boot computer with USB
  • Accept locales, at the botttom "Repair this computer"
  • Boot Win 10RE Command prompt
  • Run DISKPART, LIST VOL to see which drives are which (use the right ones below)
  • Image the original Windows drive to a USB attached backup drive, just in case using:

   >DISM.exe /Capture-Image /ImageFile:G:\SSD-whole.wim /CaptureDir:D:\ /Name:"Windows"
100GB on drive went to about 50GB in a .WIM file in <1 hour on USB3.0 backup drive
Manually copy important files, just in case:
   >xcopy /e /c /h d:\users\<username>\ g:\ssd
   >xcopy /e /c /h "d:\Program Files\" g:\ssd
   >xcopy /e /c /h "d:\Program Files (x86)\" g:\ssd
  • Once complete, reboot the computer back to the USB, accept locale info
    • Custom install
    • Delete all partitions on the SSD (including the 10% overprovisioning made for Win7, since Win10 is smarter about SSDs) -- p.s. it wouldn't install anyway since the drive was MBR partitions and not GPT
    • Create a new whole-drive partition, let Windows configure Recovery and EFI and GPT partitions
    • Install Windows
  • Update and reboot as necessary (Windows 10 online activation worked flawlessly to recognize the computer as it was already activated without entering a Product Key)
  • Run Disk Management, for the 1TB RAID set, right-click disk and say "Import foreign disk" for both.  Allow them to re-sync (this took several hours, and let it finish keeping the computer awake otherwise it will restart from 0)  If you interrupt it, you may have to right-click and "reactivate disk"
  • Once complete, on the DATA DRIVE, take Ownership with the new default admin account and remove old admin account permissions (says Unknown - S-1-5-.... from previous installation)
  • Change Settings>System>Storage to DATA DRIVE for all but applications. (didn't work before ownership correction)
  • Install Office (had online subscription and original install ISO, log into MS account to activate)
  • Add offline PST file to Outlook (Open & Export, Open Outlook Data File from DATA DRIVE)
  • Install MBAM, MBAE (have original product keys)
  • Install iTunes
    • launch once, accept EULA, close
    • launch second time holding SHIFT key, point to remote ITL iTunes Library file (all music and stuff still there)
    • Sign-in to authorize the computer
    • Connect a phone to create the C:\Users\<usernam>\AppData\Roaming\Apple Computer\MobileSync\Backup directory
    • close iTunes
    • rename Backup to BackupOld
    • open command prompt in ..\MobileSync directory and run >mklink /J "Backup" "D:\iTunes Backup"  (this creates a symlink junction to put device backups on a data drive, not the SSD)
    • thanks to: http://www.howtogeek.com/164275/how-to-change-the-backup-location-of-itunes-or-any-windows-app/
  • Download/Install other software
  • Restore Desktop and other files from the XCOPY or DISM image.
So far, so good.


Monday, June 27, 2016

NIR with Raspberry Pi


Pictures from a NoIR 5MP Raspberry Pi camera, not just for seeing in the dark...  You can do EL with a $100 camera/computer, power supply, and some image editing software.

Don't see anything in the raw image???

Change to greyscale and look really closely...

OK, digital time... auto-contrast with Photoshop Elements.  Same picture, I swear.  Do it yourself!
Probably should have covered the red LED on the front of the Pi NoIR camera.

Thursday, June 16, 2016

Treasured memories safe on CD/DVD? Think again...

Not along my normal lines of fixing, but I get into a little of everything.   In my quest to digitize our media library I've stumbled across a few scary things with CDs and DVDs that may change the way you think about these as a 20-50 year "archival" media.

If any of you know my work history of making solar panels, I've always been the "bricks and mortar" type.  Use thick sections of silicon instead of thin films because there's not much there, that's what I always say.  Apparently that transfers across technologies, as the thin films used to produce CDs and DVDs are subject to environmental factors that degrade them faster than you would believe, sometimes less than 10 years.

In digitizing probably over 300 CDs and 200 DVDs, I've found maybe 2% so far that have become unreadable by a modern computer/data grade drive.  There seems to be two primary failure mechanisms, either the lacquer coating to protect the data surface was damaged (and I'm not talking scratches) or the data layer itself has corroded.

On CDs, the data is pressed into a polycarbonate disc blank and then flashed with aluminum in a vacuum chamber before being spin-coated with a lacquer and made ready for silk-screening of the design.  The final disc is read through the bottom polycarbonate blank.  If that lacquer top coat does not seal the edges well or the aluminum is not masked or removed from the edge before lacquering, the aluminum is exposed and will oxidize and react with moisture causing the reflective layer in the CD to wrinkle.  Picture aluminum foil after you've crumpled it...

DVDs are a little different, and particularly 2-sided ones.  2-sided discs are pressed or laser cut both sides and a final lacquer applied.  In this case, the laser reads the disc through the lacquer coat, so if the coating is not applied properly, the disc not cleaned properly, or a sub-standard or contaminated lacquer is used, over time the layer can be permeable to moisture/oxygen and corroded the data layer, or the lacquer itself absorbs moisture and begins to take on an "orange-peel" texture.  Obviously not good for reading or focusing lasers to spot size ~0.8 microns.

So what to do??  Some brilliant people created an open source program for Linux called "ddrescue". Unlike "dd", which is a command line tool to write raw data to and from discs/files/whatever in sequential order, "ddrescue" works around a read error from the source and it skips ahead and keeps going, and flags that area for another attempt at some point.  It is exclusive of "dd", and uses it's own algorithm to attempt to retrieve as much data as possible.  It can even reconstruct a file/drive from two partials, say two drives of mirrored RAID setup that failed in different areas.  It has its limitations, but it's pretty darn good.

How to do it??  Understand what your doing, but essentially, within Linux you treat the CD/DVD as a data disc and recover it to the system hard drive sector by sector.  In my case, I had a side of DVD that was unreadable and truncated a 43 minutes program to 23 minutes and the following on from 43 minutes to 5 minutes.  After letting ddrescue chew on the disc for about an hour, it had recovered all but 69kB and 173kB from two source files, or less than a second of video.  The transcoding reader to digitize the files easily skipped over the error sections and there was hardly a minor blip.

NOTE:  All of my work for digitizing is for private/personal use only.  Whatever you do, understand copyright laws before you do your own work.


Monday, June 13, 2016

Is the A/C ready for summer?

It's been a while, my chances to get into things has dropped off recently with life intervening, but hey, it happens...

I had a useful one that's an easy fix (if that's the only thing that wrong!).   As things are heating up outside, I happened to be in the basement when our ground-source heat pump unit kicked on.  Instead of the familiar click and hum of the compressor starting, I heard a click and wub, no hum.  Thinking, "hmm that's not good" I  went over to the unit, which didn't show any errors, and shut it off on the control panel then turned off the local disconnect.  After waiting about 5 minutes for any energy to dissipate (capacitors), I removed the lid.

I wasn't familiar with the symptom, but knew enough about the motor and compressor setup to understand there was a problem someplace.  A quick online search brought up some similar issues in a WaterFurnace chat forum that the compressor motor run capacitor could be bad.  If you don't know what that is, it looks sort of like a V-8 juice can, right circular cylinder, that is connected with large wires into the motor/compressor circuit.  Here's the control panel side view of it (with tan and blue wires attached).


Usually when they go bad, they short and the can overheats and puffs out on the ends.  This one was very slightly domed, but when I disconnected the spade terminals and took it out, it tested open with an Ohm meter, and no reading on a capacitance meter (the can said 370VAC and 80uF or microFarad).

The chat forum had also mentioned the manufacturer went from a 440VAC rated capacitor down to a 370VAC for home units, which is normally fine since they run 240VAC.  We had recently had a power surge that took out a bunch of stuff in the house (that the power company paid to have fixed!) and could have damaged this too.  I was able to find this capacitor (440VAC, 80uF) at my local Grainger for $53, in stock.  I drove down to get it and the tech there also verified with their capacitor tester that the old one was open.

Came home, popped in the new one after removing the adapter plate which had a 2" opening instead of 2.5" for the larger 440VAC rated cap, closed it up, turned it on....  and the compressor started!

While I was in there however, I also noticed that there was quite a bit of dust underneath the compressor start contactor, and that the control board looked a little cooked under a  transistor and power resistor.  Rather than get that far into it, I called my local service guys that installed the unit (HEY, EVEN I HAVE LIMITS), and they came out and replaced the control board and contactor FOR FREE UNDER WARRANTY.  I was 8 years into a 10 year warranty.  Nice.  The contactor was severely pitted from cycling for 8 years, plus cycling for at least several days with a locked-rotor compressor.  They also checked out the unit and topped up the outside loop pressure, and verified it was delivering about 63,000BTU for a 5 ton (60,000BTU) rating.  All good.

Technical note:  For those of you not familiar with large single-phase motors, they typically have capacitor in series with one motor winding to create a "fake" second phase that makes the motor run much more efficiently.  With that capacitor open, the compressor was trying to turn two windings with only one connected, and that no worky.  See the compressor and cap in the schematic below:


Sunday, May 1, 2016

Helping out (and a free cup of coffee)

My local favorite coffee hang out, Dublin Roasters, had a problem... I thought they had closed when I didn't see their OPEN sign lit.  I stopped in and they were open, and asked about it (along with a cup of Volt Blend and a kitchen sink brownie).  Apparently the yoga class had crushed the plug.  They had replaced it but still wouldn't work.  I offered to take a look at it for them.

There were two problems, the new transformer they had found was the wrong voltage (6V) and way under-powered (like 300mA).  Getting it home, I opened the back and hooked a bench supply to the power contacts.  With a 1A current limit set, I slowly took the voltage from 6V up, the sign turned on at about 10V, at 12V it was going good, and pulling about 600mA for an LED sign.

As luck would have it, I had a leftover power supply with 12VDC and 3.15A laying around which worked perfectly.  I also happened to notice part of the second "e" in coffee was out.  I found that the PCB trace had broken on that small substring of lights, the LEDs were 5-6 in series for the 12V with a 150 Ohm current limiting resistor in the string.  A small scrape of the conformal coating and touch with the soldering iron, and it was back to full "e" status.


Thanks Dublin Roasters for the free cup of coffee and oatmeal bar on return!

2004 Toyota Prius DTC codes P0A40, P0A41, U0100, U0111

After a short trip, returning home is usually a welcome and pleasant time.  However on getting home and finding my Prius dash lit up like a Christmas tree with master warning and hybrid system warning lights, my enthusiasm quickly faded...

The last time this happened a rambunctious squirrel had its way with a the motor generator position sensor (generator resolver), as evidenced by some bare copper strands swaying in the breeze when looking straight down the front of the engine behind the radiator.  I suspected something similar, but this was a little harder to find.

After getting the car up on ramps, and crawling underneath, I finally found the offending connector, the motor position sensor (motor resolver), conveniently located halfway up the engine behind the drivers side wheel well.  I already had the Toyota part number and the tool I needed from the last time (made from a precision hex driver and a grinding wheel), so I ordered another 10 pack for about $7 each.


After removing the driver's side splash pan (have extra plastic body fasteners on hand!), I was able to get one hand in through the wheel well and another up underneath to wiggle both the motor temperature sensor and resolver plugs free.  The little rascals had chewed clean through two wires and nicked a third, but for the life of me couldn't remember how to get those darn terminals out.  After nearly an hour of unpleasant language, I conceded to cut the entire plug off (I had six new terminals and splices, well 10 actually).  After working at the kitchen table for almost another hour (dinner anyone?), here's the trick for my ailing short term memory and all you others that need to do it....

...remove the white plastic locking ring FIRST!!!  With a gentle pry up on both short edges of the white locking ring (exposed at the edge of the central plug), it pulls up and completely off the plug, exposing the plastic catches that you need to move away from the terminal to pull them out the back.

I'm waiting for the rain to subside so I can put it back on and DRIVE my Prius off the ramps.

End note, the U codes from the scan tool have to do with CAN bus communication to the battery, I think these are incidental to the furry friend incident, as they could be cleared from scan tool.

Thursday, April 7, 2016

When internal combustion no longer combusts...

HomeLite UT8514 30cc leaf blower & Homelite UT80522D 2700psi 2.3gpm pressure washer

Shaking the cobwebs out of the garden tools this year, I ran into two problems.  The trusty old leaf Homelite leaf blower that has been working faithfully since we moved out into the trees ran for about 3 minutes and then died suddenly.  As I pulled the cord to start it again, I noticed the head and spark plug wore seemed to be moving more than I would expect.  On closer inspection, I found one of the the three (YES THREE) head bolts snapped and the cylinder head was lose.  No compression, no engine.

If you haven't found it already, check out http://www.ereplacementparts.com (I have not received any compensation for their mention).  They actually have useful repair diagrams for a lot of tools and usually have reasonable prices and decent shipping.  Well, a look for the blower and I find new head bolts are $0.99 each, one broke, order three new and replace them all!!!
Cover removed, crankcase cover open, missing (snapped) head bolt just below the crankcase.

Snapped head bolt, they're only M5!
So, about a 30 minute job later (and luckily the head bolt snapped where I could turn it out with needle nose pliers without a whole tear down, bolt it all back together and it fired right up!

The other one for the power tool closet, the pressure washer.   OK, so it was giving me some fits to keep running last fall and I kinda winterized and forgot about it.  After 45 minutes of pulling, purging the fuel bowl on the carburetor, and using starting ether, I couldn't keep it running longer than about 10 seconds, and only then with the choke full on...  Grrrr....

Once again (the same order actually), ereplacementparts did it.  This time an ENTIRE new carburetor for a Homelite pressure washer was $23 (and this is a $250 pressure washer about two years old).  Other than the fact you had to unbolt the engine and plastic facade from the frame, this would have been a 5 minute job to replace, as it was, it ended up being about 25 minutes.  It looked from the old carburetor that the fuel jet was damaged (or not protruding into the intake far enough to get into the venturi stream) somehow and not putting enough fuel in, makes sense it would run on choke, eh?  
Note the hemostats to clamp the fuel artery.
Button it all up, five pulls (three after I remembered to attach the spark plug wire again!) later, and ran like it was new.

Fix it, don't throw it out! 

Tuesday, March 22, 2016

iOS 9.x Text Message on all phones sharing iCloud account

I've been experimenting in the iOS 9.3 Beta program to see if it fixes some of the phone hang up button and Bluetooth hand off issues I was having with a iPhone 5 on 9.2.1.  During one of the updates, it asked for iCloud signin again and my wife concurrently received a message asking to allow text messages from me.  She said yes, and thereafter both our phones were receiving text messages from each others phone.

It may be obvious to some, but I'll share because it drove us both nuts for about a week.

Go to Settings>>Messages>>Send&Receive and check which emails/phone numbers on the AppleID or iCloud account should receive messages to each device.  Somehow, all 6 were checked on mine and my number was checked on my wife's phone.

NOTE: We haven't gone through setup of the Family Sharing program yet because it requires a credit card, so far we've been living in the AppStore world with redeemed change jar gift cards.


What it should look like on a phone with only your number checked.

The other annoyance was that the it changed the contact info associated with with phone, as viewed through Phone>>Contacts, it listed my wife's name with my number.  I needed to change this back by going to Settings>>Mail, Contacts, and Calendars>>CONTACTS-My Info.


Saturday, March 5, 2016

Nabi2 - Red & Green Blinky/No Blinky

No good deed goes unpunished...

Last fall I happen to find at my local used electronics store 3 Nabi2 and 3 NabiJr learning tablet computers for $240, less than half price new.  We had been talking about getting them for my son's school last year and just never happened.  I jumped on the deal, picked up some spare power cords from Amazon, and brought them into school.

Since I first got them, the charging for the Nabi2 (a 7" tablet) has been spotty, I ended up having to return one "OEM" charging cable to Amazon because it wouldn't charge the tablets.  A couple weeks ago one of the teachers complained the tablet wasn't charging at all, so it became my next victim.

The tablets use a bizarre and non-standard 0.7x2.6mm barrel plug, the first problem.  I tried again to charge it at home and no charge light would come on and the battery was dead, wouldn't turn on more than to show a empty battery icon.  The case opens with four little screws on the back, at each corner behind the red bumps on front, and a little ginger prying (there are 3-4 snap closures per edge).  Once inside, I found the culprit, the charging jack was actually cracked.
Inside the Nabi2 with new jack charging.
The Nabi charges at 2A, but still uses a USB style power controller that detects if the voltage drops below the 5% spec of 5V.  I cut apart the "OEM" cable and found a rather cheap plug that was poorly soldered, and 26AWG wire, which at 3 feet long and 2A, has about a 0.5VDC drop.  So unless you're using a really hot 5.25V USB charger (which isn't completely unusual, most are 5.1-5.2 to account for voltage drop under load), it likely wasn't going to work and the tablet would just blink red-green to indicate charging error.  I verified this as a cause by hooking it up to my bench power supply to which I can limit the output current-voltage, 5V and 1A limit wouldn't charge and 4.7V and 2A wouldn't charge either.  Luckily, I picked up a 5VDC, 2A Raspberry Pi power supply with 20AWG wire and some new plugs, and wired that up for a dedicated charger.

The parts are available at:

A word of caution, unsoldering the old plug is a pain, partly because of the flimsy tabs on the power jack and also because they glued the jack onto the board with some red adhesive during factory assembly.  I actually damaged the positive landing pad and had to scrape of some of the green conformal coating adjacent to solder on a jumper for the new jack.
Power jack next to the microUSB slot


Saturday, February 27, 2016

BRUNO Typhoon C3


I was helping a friend out this week with a project that will hopefully make life a little easier for the next person.  His fiance died last fall after losing a battle with bladder cancer, and they had gotten a mobility scooter from a friend to help her get around in the last months of her battle.  Unfortunately, it had been stored outside in a barn and wasn't working when they got it.  After some money spent at the "official" mobility repair shop and getting an answer that the batteries were dead and the motor seized and was "unrepairable", it sat in the back of a car for 6 months never used.  As my friend was starting to clean out and move on after his loss, I offered to take a look at it for him...

The unit was a BRUNO Typhoon C3 made in 2004, and apparently BRUNO no longer makes the scooters, just the lifts that move them in and out of cars, no repair manual available, and nothing to start from.  First things first, follow the power.

Under the rear faring
I removed the rear fairing and found the shop had "recycled" the batteries (wondering why it was so light).  So I hooked up a 24VDC/11A power supply for testing.  Turning the key switch for the scooter did nothing...  I removed the battery tray and disconnected the lead running into the 70A drive control.  Popping open the drive control, all looked good in there, with little more than some dust and dirt in the connection openings.  The battery harness was set up for connection to two 12VDC 18AH 1/2-U1 batteries, and wired so that there is a resettable circuit breaker between the cells.  Battery power runs down the drive control, and is paralleled at the 6-position connector there to supply power back to 18AWG wires for the steering column controls through an 8A fuse, which was good.

As I dug into the driver controls, I noticed that I could get a very faint and momentary beep out of the horn.  As I removed the control board I checked the key switch, which was fine.  One trace didn't look very good.  and it was the power coming off the key switch.  I took the board downstairs and sure enough, didn't have continuity.
Corroded power trace (under 5X microscope)

Trace repair with pink wire.  Key switch connector is yellow.

I took the board back out, installed everything, and now the unit powered up, battery meter read out, and horn worked.  The drive wouldn't do anything more than click.

I removed the axle/transmission/motor unit with the four bolts, and removed the motor (two M6x60 bolts, one of which was missing from the "official" repair shop).  I removed the the safety clutch with three screws and found that indeed, the motor shaft was stuck.  A pair of channel locks and relatively little force broke it free.  I removed both brushes, the lower was a little stuck, but seemed to be in good shape, as was the commutator.  Once reassembled without the clutch, I juiced it with 24V and it spun.  A quick trip to local hardware store (the HOMETOWN one, not big box, have to say I love that place for one-off small nuts and bolts!!!) got me new motor mount bolts for $2.86.  Put it all back together, and it runs!!!  A stop over to BatteryOne got me two new batteries for $84.70 with tax (not $300 like the mobility store was going to charge my friend!).

Darn thing works like a champ now.  Hopefully the next person can get some use out of it and make enjoying life a little easier.

Monday, February 22, 2016

USB or not USB... that is the question...

I had a friend from my son's school stop me last week and ask about an external hard drive that had broken.  I told him to bring it in and I'd take a look at it.  When he brought it in, the problem was obvious, the super speed microUSB jack had broken off the PCB in the docking base and was still attached to the USB cord.  Not good.  He said the best he could find to replace the dock was about $100 on eBay.  I told him I'd take a look, but I thought it might have ripped the traces off the PCB.

The unit was a Seagate external backup with a base unit that gets power and USB connection, and presents an SATA connection to a cased hard drive that plugs on top.  The base unit conveniently just popped apart with a little prying around the edges and revealed the PCB inside with three #0 Philips screws to free it from the case.

Detached SS microUSB (long thin 10 contact connector)
A quick look under the 5X stereo microscope showed all the traces were still good, and that the socket that had come off the board did not appear to have been soldered properly on the shield to board connection, likely a cold solder joint from inadequate reflow profile.

I was able to remove the microUSB SS connector from another board I had, using the Master heat gun and a Weller Pyropen, and was able to insert it into the PCB with a 15W pencil tip to heat up the case ground tabs to get it through.  I need to solder each individual connection as well, again with a 15W pencil tip under the microscope and keeping the tip just wetted with 0.022" rosin core and letting the solder on the socket and PCB wet together.

Final test with a spare SATA 2.5" hard drive here, and presto, looks like all the connections are good and the little bugger works again.  MAYBE, a $0.30 part if I hadn't been able to poach one, and 20 minutes.

Monday, February 15, 2016

Got a loose screw? VIBRA-TITE

We've loved our New Holland TC29DA compact tractor since we got it back in 2005, it's been a real workhorse for moving dirt, rocks, snow, gravel, trees, etc...  But it's had one nagging problem since about 2010...  The transmission case bolts that separate the HST from the clutch casing habitually get loose and back out.    The tell-tale sign is that it starts leaking hydro fluid while parked, and when under heavy hydro load, will actually spray out from the loose case seal.

The dealer says he's only seen it on tractors that use a 3-point hitch backhoe, but our backhoe attachment is the New Holland brand that utilizes a subframe to transfer some of the force up to the front frame under the loader.

So far we've tried;
 - re-torquing the bolts (#21 in picture, but installed from the front)
 - removing all accessible bolts, cleaning the holes and bolts with brake cleaner/degreaser
 - applying medium-strength blue thread locker to all the bolts
 - buying new case bolts with new captive lock washers and replacing

All have failed and come loose again in between 10-50 hours of use.

This time we went for the proverbial belt and suspenders approach.  I replaced the M10x30 bolts with grade 8.8, each have a polyester spray locking patch.  They've also been coated with VC-3 grade Vibra-tite, a non-curing acrylic gel (dissolved in MEK) that prevents any vibration loosing as the material stays in a soft and cold-flow state.  The bolts are then kept under tension with Belleville cupped spring washers, that apply about 550lbs of work load when flattened.

Original bolt on left, replacement on right

Get ready to work a bit putting the new ones in, they have to be cranked all the way in as the VC-3 cold flows under work load, but it does feel secure.  I'm feeling pretty confident that'll hold it in as I watch the snow pile up once again outside the window...

Monday, February 8, 2016

HP JetDirect 615n Reflow and Snow damage


Couple good ones this time...

I regularly help out at my son's school with computer issues, and the teacher there gave me an interesting one Friday.  An old HP LaserJet 2300 lost network connection, and she said there were consistent failures with these HP JetDirect 615n networking cards in the printer.  She wasn't willing to give up on the printer since they are bullet-proof and very cheap to operate in a school setting... so I dug in.  Apparently there is a know issue with the 615n cards (and many other current-day BGA-attached processors for that matter) the cards suffer from either a poor solder job on the main ARM processor or were poorly designed thermally that repeated cycling of the processor package results in solder contacts breaking from the ball-grid array under the main chip.

I took the cards home and  removed the plastic and metal shield around the network connector.
I prepped a lab ring stand with clamps to hold the boards 4" above a 1000F Master heat gun, the temperature control (air-throttle) was set to about halfway closed.  I mixed a little plain paste-flux into 91% isopropyl alcohol and dropped several drops around the perimeter of the main chip.  I placed the boards in a 130C (265F) oven for 4 minutes to pre-heat the board and drive off the IPA and water.  Turn on the heat gun, pull the board out and clamp it with the heat gun centered on the back side of the PCB below the main chip.  I tracked the temperature of the chip from the top with a cheap IR point-and-shoot temperature gun.  In about 90 seconds it ramped up to 200C.  I pulled the heat gun and aimed it carefully at the main chip for about 30 seconds to reach ~220-230C.  Then put the heat gun back below the board and switch it to fan only for about 2 minutes which cooled it back to 70C or so.  I ended up doing this on two cards, and both began operating in the printer again.  Personally, I was amazed.

 This is a test board where I successfully desoldered an 80 pin QFP chip to test the method before hitting the boards.
My other project was on my own roof.  The recent east coast snow storm dumped 38" at our house.  This time the snow catchers saved the gutters (which were trashed in the 30"+15" incher in 2010), but apparently the weight of all the snow melt sliding down my 10/12 pitch roof and solar panels was too much for the transition boxes to take the wiring to conduit.  Both boxes were ripped free of the roof and rolled over, snapping a 1/4" fiberglass tab on all four corners.  I was able to re-drill new holes and reattach, but even some of the MC2 connectors had pulled free of the module wiring.  This too some 3/4" poplar foot pegs to allow me to Spider-man/rock climb up the 10/12 pitch and reconnect wires that were two-thirds of the way up the slope...  this transition box system is going to get a re-design in the coming months...

Fiberglass box ripped off the S-5! clamps & conduit
Start Spider-Man!  My wife was kind enough to photo
for the insurance claim/hospital visit.
Where did that wire go!?!?!


Friday, February 5, 2016

Xerox Phaser 8560 pre-heater error

Special edition...

I've always been quite enamored with the Xerox Phaser solid ink printers for some reason, very cool idea and no toner mess...  You can likely find them cheap used, I picked up 3 for under $40 each.  The 8500 series, is very fixable, service manual being online, and only two torx screws needed to open the thing up.

I had an 8560 with a pre-heater error.  After swapping the pre-heater with another printer and still getting the same error 37,008.44, a nice person said it might be a fuse.  http://www.fortwayneprinterrepair.com/wordpress/2012/05/24/37008-44-error-xerox-phaser-8400/

About 6 plugs and 16 screws later, I'm inside the electronics package and sure enough, one of the 10A fuses is out, F3 in my case.  Popped a new one in from a broken spare printer (one of the 10 driver chips on the print head itself finally died, I think from overheat due to ink spillage and someone moving a hot printer!)  and re-assemble, the darn thing works again.


Enough for now...

Montana 2740 tractor and 2013 Nissan Pathfinder Drivers Door Handle

With the recent 38" snow here in Maryland, I had a chance to fix a bunch of stuff around the neighborhood:

A neighbor's Montana 2740 compact tractor snapped off the loader valve handle... drill it out and tap it to 5/16" thread and used a new piece of all thread to get it working.

My son continues to bring home reading books for homework that are paperbacks with pages falling out.  PLEASE DO NOT USE Scotch Tape!!!  Best thing to do, unfold/uncrease the pages as best as possible and use a SMALL amount of Elmer's glue along the spine to set each page that's fallen out back in, then rejoin the outside cover/spine with a strip of clear packing tape.

Door handle break on a 2013 Nissan Pathfinder like our did in the recent snow?   Pull on it and it doesn't spring return and just flops around.   Don't send it to the dealer for a $115 evaluation fee + repairs.  Get a Philips screwdriver, metric socket, and plastic automotive pry tools...
    The small plate behind the chromed (PLASTIC!!!) door handle pops out from the hinge side, remove the screw there.
    The back plate inside the armrest door pull pops out from the top with three catches, remove the two screws there.

    Pop out the kickplate light in the bottom of the door panel, disconnect the light.
    Pop out the window/lock controller from the armrest, disconnect the three plugs there.

    Pull the door panel free of the door starting from the bottom near the hinge side/speaker, work across the bottom and up the latch side.  The top corner near the side mirror is a hook that the panel hangs on.  Disconnect the plug going to the seat memory controls.
   Disconnect the door handle from the panel with 3 screws.
   Disconnect the door lock and latch cables from the BROKEN handle.
   Install the new handle part from your local Nissan dealer for ~$15.
   Re-install everything in reverse order.
   THE CATCH IS KNOWING WHERE TO PRY TO REMOVE THE FIRST TWO COVERS.   The service manual just says "remove the escutcheon using a suitable tool".  What the heck is an "escutcheon" anyway!!

p.s. Surpirse, the door handle has been redesigned to strengthen the door opener catch for the cable, just where ours broke!